Tom Yum Goong

I wanted to make this dish since last week. Just realized that I have 1.5 lt of the shrimp broth and I need to make something with it because freezer start to be too full with many kind of stocks. Beef, chicken, shrimp and veggie stocks.

So finally today I made it, but completely forgot to get cilantro and basil. Auch!

So, this one is a twisted Tom Yum, but I LOVE it since I did something really different and this soup became sweet and sour and WITHOUT adding any sugar or sweetener!

Let’s start!

Ingredients:

  • 2 cm of ginger, crush it
  • 2 cm of galangal, crush it
  • 2 lemon grass, crush it
  • 3 green tomatoes, quarter it
  • 1 red tomato, cut to 8
  • Lime leaves
  • Big red chilies
  • Small red chilies
  • Small bird chili
  • Shallots (as much as 1 big yellow onion), slice it
  • 2 garlic cloves, crush it
  • 200 gr of shrimp/ prawn
  • 2 big squids, cut it to bite size. DO NOT throw away the squid ink. This is the “sugar replacement”
  • Salt
  • White pepper
  • Lime juice

Instructions:

  1. Prep up the shrimp and the squid. Pour in the lime juice, salt and white pepper.
  2. Heat up the pot in medium flame, add in oil, and once ready, add in the shallots and the garlic. As usual, the key to whole and deep and sweet flavor is to caramelize the shallots/ onion!
  3. Once almost caramelized, add in the lime leaves, ginger, galangal, and lemon grass, continue until you see your onion/ shallots is caramelized.
  4. Add in red tomatoes, mix it in for about 1 minute, followed by green tomatoes, and the chilies, and pour the shrimp broth. Wait until it starts bubbling. Then lower the flame and simmer for about 10 mins.
  5. Then, add in the shrimp and squid only until the shrimp goes red. (Around 4-5 mins)

That’s it.
Yes, it’s that easy. Spicy, sweet, sour, hot and fresh for the hot day!

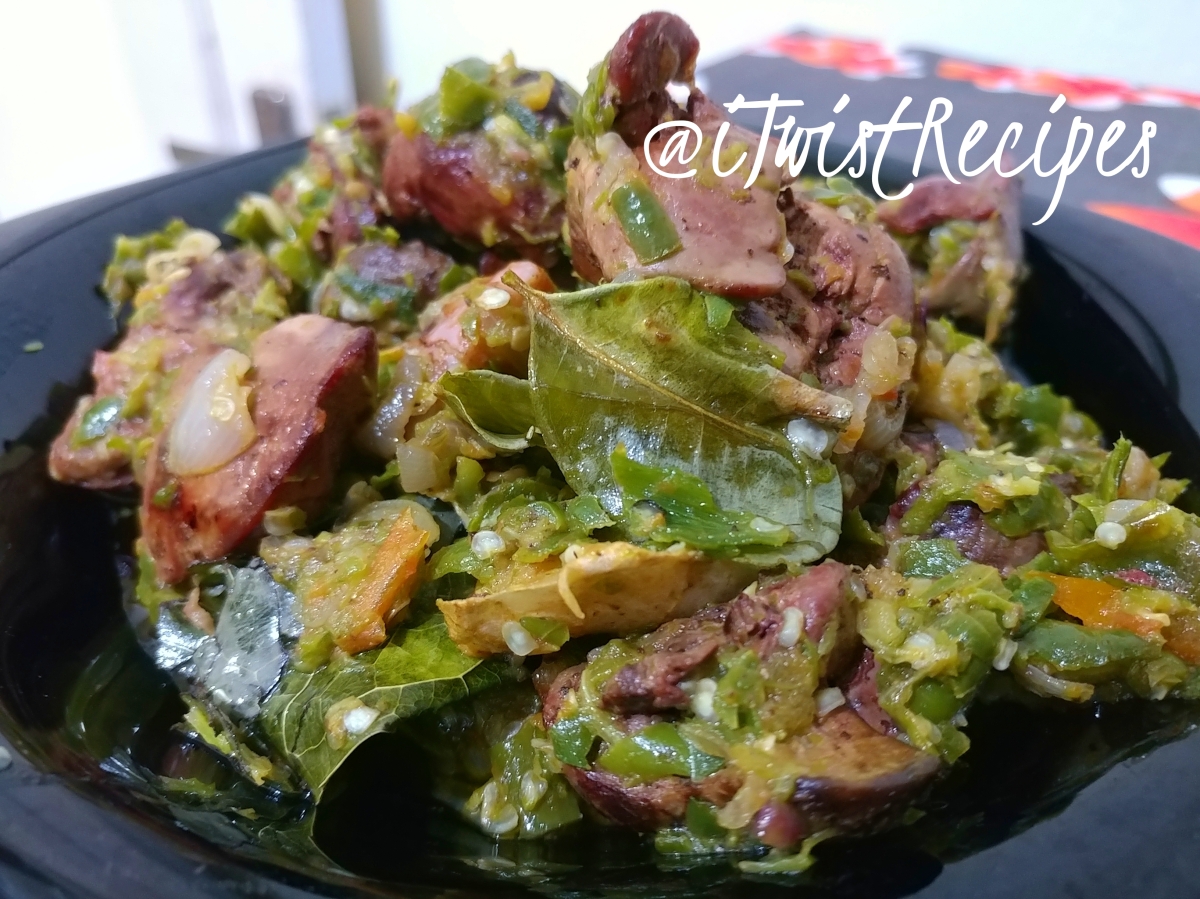
Spicy green chili chicken gizzard & liver

I had the inspiration to cook it from a shared post by a friend of mine in Facebook. The recipes were different one to another, but I got the idea.

Then, just based on my taste, I decided to go with my guts. Here it is!

Ingredients:
– 100 gr curly green chilies
– 100 gr large green chilies
– 100 gr bird’s eye chilies
– 10-15 medium shallots
– 5 garlic cloves
– Salt
– Lime leaves
– Bay leaf
– 2 cm ginger
– 2 cm galangal
– 5 pairs of liver & gizzards (around 500 gr)
– 3 small green tomatoes or 1 red tomatoes

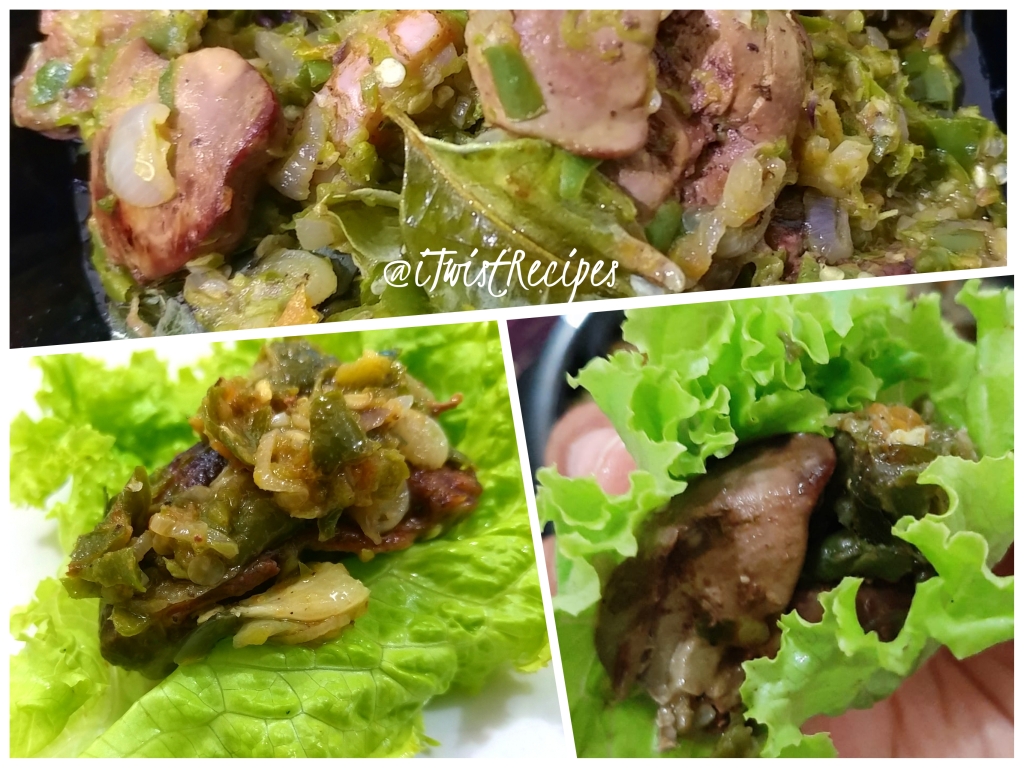
Optional: curly lettuce (I’ll tell you why later! 😉)

Instructions:

  1. Simmer the liver & gizzards along with 2 cloves of garlic and salt until the gizzard is tender.
  2. Do not throw away the water after the gizzard is tender. Instead, put all kind of green chilies and the tomato and boil until they’re soft.
  3. Fry the liver and the gizzard (half fried) and then put them aside.
  4. While frying the liver and gizzard, slice the shallots and 3 cloves of garlic. Once done frying the liver and gizzard, then saute and caramelize the shallots, garlic, lime leaves, bay leaf, galangal, and ginger.
  5. Use the food processor, pulse the chilies and tomato only until they’re “shredded”. Or you can also use the mortar and pestle. I’m lazy. I chosed food processor. Not even a minute!
  6. Once the ingredients in your pan are caramelized well, mix in the shredded chili and tomato for about 2 minutes, then add in the liver and gizzard. Just mix them and that’s it. You’re done!

I had an ice cream sandwich earlier in the afternoon. So, to reduce my guilty feeling, I tried to be healthier on my dinner. I was inspired by the Bulgogi that I ate by wrapping it up with the lettuce, so I also wrap it up with the curly lettuce! And guess what? I LOVE IT!

Selat Solo (Javanese Beef Steak)

Ingredients:

– 1 kg tenderloin/ shank
– 20 shallots (more or less)/ 1 big green onion
– 3 garlic cloves
– 3cm ginger
– 2 ghost chillies
– salt
– pepper
– 5 tbsp tomato ketchup
– 2 big fresh tomatoes (dice it)
– 1 big fresh tomato (slice to 6)
– Sweet soy sauce (5 tbsp)
– lettuce
– 4 boiled eggs
– 4 tbsp sweet soy sauce
– a bit of freshly ground nutmeg
– 1 tbsp corn starch

Complements:
– fried potato wedges
– steam/ boiled green beans and carrots
– mayonnaise

Instructions:
1. Marinate the beef with salt and pepper for at least 3 hours
2. Blanche the potato wedges, carrots and green beans in salted water.
3. Put the beef and the veggies in the fridge
4. Grind/ blend shallots/ onion, garlic, ginger and chilies with a bit of coconut oil in the food processor
5. Dice the 2 tomatoes
6. Heat up the pressure cooker on the big flame, pour about 3 tbsp of coconut oil once you can see the smoke, brown the meat on all sides. About 1-2 minutes each side. Put them aside.
7. Start to sautee the shallots-garlic-ginger-chili mix. About 3-4 mins, on a medium flame. Then add in the diced tomatoes, until they go wilted and a bit caramelized.
8. Add salt, pepper, freshly ground nutmeg, sweet soy sauce, tomato ketchup. Stir it up, add the browned meat and boiled eggs.
9. Pour boiled water around 1-1.5 ltrs, crank up the heat and cover the pressure cooker with the lid. Turn the stove off 20 minutes after sizzling.
10. Move the meat and the egg to a big wok, and strain the broth.
11. Simmer it to the consistency that you want (I love the broth so I always leave more than enough broth, and anyway…you need the broth to be the gravy)
12. When it seems enough gravy you have in the wok, then, add the mix of 1 tbsp corn starch with a bit of cold water. This will make the broth turns to gravy consistency.
13. The rest? Just fry the potato wedges, steam/ boil the carrots and green bean. Don’t take too long for boiling them, since crunchy veggie is the key.
14. To serve it, just arrange the egg, lettuce, sliced tomatoes, fried potato wedges, the veggies on the plate and put the meat in the middle. Pour the gravy all over and put 1 tbsp mayo to complete it.

It’s easy. Just too much to do 😁

Keto Lettuce Burger

The best food in my whole LIFE. Definitely only for cheese, bacon or BLT lovers!

Warning:
This is the best meal in my whole LIFE! If you fall in love with it, don’t blame me!

First of all, I’m a fan of fats. shallots/ onion, and a hater of bun (I actually never like bread and such and won’t eat it unless it’s the last option or I just don’t want to hurt the cook’s or the host’s feeling. Same feeling as rice. Mom had to make 3 bowl of rice porridge when I was a baby because I kept trying to vomit it. Growing up I get better, I can eat them, but if I have any option, then I won’t).

Okay, back to the burger. FYI, going through this COVID19 outbreak, onion become so freakin’ expensive here in Indonesia. The cheapest I found so far is IDR 150,000/ Kg or around USD10.5 with the recent rate. It was usually just around IDR 23,000. More than 6x the normal price!!

So, since I badly want to eat burger, I have to substitute it to the, well…better price. Shallots! Price is less than half and it taste great also.

So onion lovers, you can always seek comforts from shallots. Also, I know peeling it up is a homework (in Indonesia, shallot is small. 2cm diameter shallot is considered a big one) and that’s the reason why I always peel it up in front of the TV and prep it up so it’s ready to use.

So, let’s start!
THE BURGER PATTIES
Portion: it’ll make 12.5 of 7cm diameter and 1.5cm patties.

Ingredients:

    • 1 clove of garlic, grate it
    • 10 clove of medium shallots, grate it (the more the better 😉)
    • 125 gr of grated mozzarella (you just need to use the same type of grater. Save you the dish washing time).
    • Paprika powder
    • Salt
    • Pepper
    • Dry minced onion (just because I have. But this one is optional)
    • 1 Kg of minced beef (ask for the one with more fats. It has flavor and it helps the patty stays together).

Instruction:

    1. Mix all the ingredients. Make sure that it mixed well.
    2. You can grill them now of keep it in the freezer for next meal. But remember to separate each other using baking paper.
    3. Grill them 3 minutes each side.
    4. If you want to put your (extra) cheese slices on it, put them on the grilled side and cover it up.

BURGER SAUCE

You will need relish or what I just did is the refrigerator pickles (I crushed them using the blender with the extra pickle water) – it already have the pepper, salt and the pickles!

    • Mayonnaise
    • Extra virgin olive oil
    • Minced onion/ onion powder
    • Garlic powder.

Mix them up together, be careful not too add too much liquid. You want the sauce consistency. Not the dressing one.
LETTUCE BURGER

    1. Lettuce
    2. Burger sauce
    3. Burger patty
    4. Cheese
    5. Pickles
    6. Crispy Bacon
    7. Hot sauce
    8. Tomato slices
    9. Burger sauce
    10. Lettuce

In that order. And eat.

After 16 years cooking, this dish by far is at my top favorite! So juicy, so balance, so cheesy oh God… It’s great!

My bf told me this when he saw me eating this burger, “Well my late Grandma said, Kisses don’t last, but good cooking do.” I agree 1000% Grandma!

IMG-20200405-WA0004

PS:
You cannot see the patty since it’s covered by 3 LAYERS of cheese. My bad! 😂😂

Update:

Just ate it for dinner, finally get the pic of the patty!

Oh! My plant-based bf decided to cheat. He cheated happily! 😂😂😂

BLT_Burger_sandwich.jpg

lettuce_burger.jpg

Mushroom Gravy (Keto/ Paleo/ Vegan/ Vegetarian)

This is by far the best gravy recipe. You can adjust it to Keto, paleo, vegan, or vegetarian.

Still remember the gravy I made? This one is basically just add mushroom. And if you are vegetarian or vegan or paleo, then use vegetable stocks instead of chicken stocks. Chicken stocks works well for the ketorian.

Always remember to caramelize the onion. Somehow you’ll have better, sweeter, whole flavor without adding sugar.

End product: 2 jars of 500ml & 1 jar or 300ml

Ingredients:

  • 150 gr of portabella or shitake or both mushroom (I use the leftover of both), chop them in the food processor or slice them thin.
  • 1 onion, or 15 medium shallots. Caramelize it.
  • 1 clove of garlic
  • Salt
  • Black pepper
  • 2 tsp ground paprika
  • 1 tbsp dry thyme
  • 2 tbsp cumin ground (It’s a MUST! Trust me and use this. It’s the great taste that you’ll love.)
  • 1500 ml stocks (chicken/ beef/ vegetable)

Note:
When you use vegetable stocks, you need to add 2 tbsp of corn starch diluted in water (just a little) and pour it to the gravy after it’s simmered. Or else, it”ll be too runny. You should also use hand blender to make your gravy thickens.

Instructions:

  1. Chop garlic in the food processor, followed by onion.
  2. Add 2 tbsp of frying oil (use vegetable oil/ coconut oil or butter) to the heated pan, and add in the chopped onion and garlic on low medium flame. Caramelize it. It’s the base of great dishes I think. When possible, always caramelize onion and garlic before cooking anything. It replaced sugar and it means healthier.
  3. Add ground paprika, salt, black pepper, thyme and cumin once the onion is caramelized. Mix it up and leave it that way for around 2 mins.
  4. Chop mushroom in the food processor. And then add them into the pan. Keep mixing it until you don’t see anymore moisture.
  5. Pour the stock then simmer it until it goes to half the original liquid.
  6. Use the hand blender, blend it and then, just strain it. Serve it warm!

Vegan Wellington

I made this for my man. He is trying to be egg-free & meat free. It works!

Ingredients:

TO BE SAUTE:
– 2 tbsp coconut oil
– 4 medium carrots
– 3 stalks celery
– 1 onion
– 1 garlic clove/ 1 tsp garlic powder
– 300 gr mushroom (any kind)
– 1 tsp cumin
– 1.5 tsp thyme
– 1 tsp rosemary
– salt
– pepper
– soy sauce

TO BE MIXED:
– 1 can of chickpeas (drained, don’t wash) then mash it.
– 2 tbsp tomato paste
– 1.5 tbsp Worcestershire sauce
– 1/2 cup of bread crumbs
– 1 tbsp cornstarch

The blanket: store-bought puff pastry

Instruction:

  1. In food processor, put the carrots, celery, onion and pulse it until it’s diced.
  2. Heat up the coconut oil, then saute all the ingredients until the moisture’s gone. Your pan should be dry.
  3. Let it cool down and put it aside
  4. Mash chickpeas, but not to fine. Leave some texture.
  5. Mix chickpeas with the saute ingredients, along with the tomato paste, Worcestershire sauce, and bread crumbs. Taste it and season well before you add the corn starch.
  6. Prepare your puff pastry, shape the mixture into a solid log then put it in the middle of puff pastry and then wrap it up. Roll each ends and press gently to seal. Trim the dough with a knife (don’t go all the way) just so it looks pretty later.
  7. Brush the top with coconut oil (original recipe asked for vegan butter)
  8. Place it in preheated oven with 150C for 35-40 mins/ until it’s golden brown
  9. Let it sit around 10 mins before cutting it.You know what? It’s best to be eaten with gravy!

20181225_183549_HDR(1)

Yellow Spiced Fried Chicken

My favorite recipe. I can cook this and keep it in the fridge and only fry it when I need!

As promised in the previous post, here is the recipe for the yellow spiced fried chicken. As far as I know, my grandma cooked this before I was born. I didn’t get the recipe from her because she never really told me how until the day she passed away. So I will decide that it is a Javanese meal, the island with the most population in Indonesia.

Some of the ingredients probably is not easy to be found. However, I will try my best to give you the alternative.

One of the sexy ingredient is Turmeric. This is the hero of this dish because this one makes the chicken yellow.turmeric

What I love about cooking this, I can just keep it in the fridge and only fry it when I want to eat. Pretty practical for modern life without having to freeze it, thaw it, etc etc…

Okay let’s start.


Ingredients:

  • 1 Kg of chicken (you can also add liver, gizzard whatever, as long as the total weight is 1 Kg)
  • 2 bay leaves
  • Enough water to cover the whole chicken

Crushed Seasonings:

  • Salt
  • White ground pepper
  • 6 pcs candle nuts
  • 1 clove of garlic
  • 1 tsp coriander seeds (optional, but it’ll taste better. You can replace it with ground coriander)
  • 2 cm turmeric (or maybe…1 tbsp ground turmeric. Add bit by bit from 1/2 tbsp)

Instructions:

  1. After you’re done crushing the seasonings, heat up the pan, put enough frying oil, and saute the crushed seasonings and bay-leaf until you smell the aroma.
  2. Then, add in the chicken, and pour the water until covering the chicken. Then, shimmer it with the small flame until the water’s gone and what’s left is just the goodness. The chicken, and the chicken fat. Until here. you’re basically done. You can leave it until it’s cooling down and store it in fridge, or just fry it.

Yeap it’s easy. That’s why it’s always been my favorite. I got 2 products. The chicken, and the spiced chicken fat (this one can be used for fried rice, veggy stir-fry etc!

Have fun!

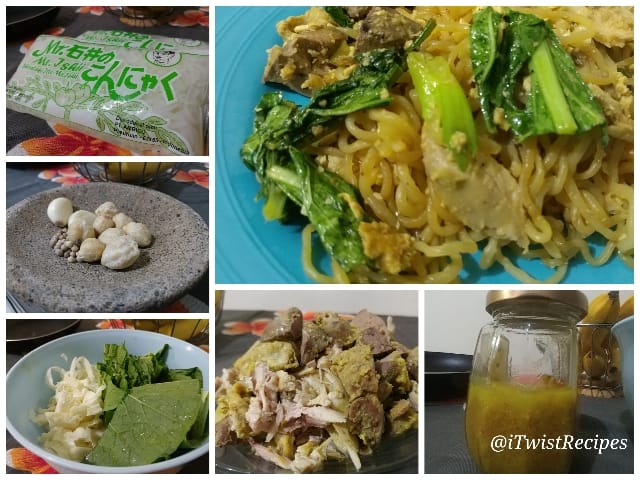
Fried Shirataki Noodle with chicken and liver

When you try to avoid feeling guilty of the carbs, replace it with Shirataki noodle

DISCLAIMER:

I use Shirataki noodle because I tried to avoid carbs. But since I am a dirty Ketorian, I still use the normal sweet soy sauce and oyster sauce, even though I shouldn’t. My bad.

I didn’t even know what is the effect of candle nuts. I have no idea on how to calculate the nutrition. So… this Shirataki noodle is just to reduce my guilty feeling. But don’t take this recipe as a keto recipe.

You can also replace the yellow spiced chicken and liver with the raw one. But remember to fry them until it’s cooked before mixing it up with your noodle.

Portion: 5-6 plates

Ingredients:
– Shirataki noodle 2 packs
– Mustard greens
– Cabbage
– Spring Onion
– Shredded yellow spiced chicken and liver (okay…I will post another recipe on this)
– Chicken fat
– 3 eggs
– Sweet soy sauce
– Oyster Sauce

Crushed seasonings:
– Salt
– White pepper corn
– 8 candle nuts
– 2 cloves of garlic
– 6 cloves of shallots (you can replace it with 1 caramelized yellow onion)

Instructions:

  1. Saute crushed seasonings until you can smell the aroma, then put it aside
  2. Scramble the eggs
  3. Add in the crushed seasonings, shredded yellow spiced chicken and liver, mustard greens, cabbage and spring onion.
  4. Mix it up until the mustard greens are half cooked, then add in shirataki noodle. Add sweet soy sauce and and oyster sauce and mix it up again until the color is evenly brown from the sweet soy sauce.
  5. You’re done!

Japanese Cheese Cake

Not really healthy. You got sugar here. Anyway…as long as you don’t eat it all at once or eating this everyday, I think you’ll be just fine.

Jap cheese cake

It’s a beauty! Very light, not too sweet (as most of cheesecake), very cheesy and the texture is to die for. A friend of mine said: it looks like bought from the store!

Honestly speaking I made this 2-3 years ago but only have a chance to update this page today. huhuhu lazy me.

Here is the recipe!

INGREDIENTS:
3 egg yolks
1 egg
50g condensed milk
50g plain flour – sieved
100g cream cheese (increased to 130g for a stronger flavor)
35ml canola oil
1 tsp lemon juice (to enhance flavor)
3 egg whites
45g castor sugar
1 tsp lemon juice
Baking instruction:
  1. Grease and line the bottom of a 6″ round tin.  Lightly grease the sides too.
  2. Preheat oven at 150C.
  3. Melt cream cheese  by double boiling over stove.  Once melted,  whisk lightly to a smooth consistency.  Set aside.
  4. Mix yolks, 1 egg and condensed milk until well combined.  Set aside.
  5. Heat oil over stove.  Once done, drizzle over sieved flour and quickly mix to a smooth paste.  Set aside.
  6. Pour yolk mixture into the cream cheese, mix well, then add in flour mixture, whisk until well combined.  Set aside.
  7. Beat egg whites until foamy, add in lemon juice, then add sugar in 3 batches.  Continue beating until attain stiff peak.
  8. Fold in meringue to the yolk mixture by several batches.  Be sure to fold till you don’t see any streaks of meringue.
  9. Pour in batter to baking tin, tap few times on table top to release air bubbles.
  10. Bake by water-bath method. 150C for 30min, then 130C for another 75min.
  11. Once done, invert to cool for 5min and remove mold.  Then revert back upright to cool completely.

Sour Fish Soup

an easy and healthy dish to make! And no…it’s not fishy. It’s fish soup. But not fishy.

Quick meal. Healthy and tasty!

Ingredients:
500 gr any fish. Tuna, carp, gold fish, catfish any kind.
3 tbsp fried oil
1 tsp salt
5 chilies, slice thin
6 shallots, slice thin
500 ml water (if you have fish/shrimp broth, that would be great!)
3 cm fresh ginger (grind it)
1 tsp white pepper ground
2 pcs spring onion, slice thin
basil leaves (a cup)
2 lime leaves
crushed lemon grass
turmeric leaves (just enough)
½ lime, or 1 lemon
1 ½ tbsp salt

Cooking instruction:

  1. Clean up the fish, and rub the salt and lemon/ lime on it. Leave it for 15 mins.
  2. Heat up the fried oil, and saute the shallots, lime leaves, turmeric leaves until you can smell the nice aroma.
  3. Add water/ broth, add in spring onion, pepper, salt and leave it until it’s bubbling. (on a medium flame)
  4. Add in the fish and the lime/ lemon juice and chillies, leave it for 5 mins, then add in the basil leaves. Don’t leave it on the flame too long, just about 1 min, and then whalla! It’s done!