Tom Yum Goong

I wanted to make this dish since last week. Just realized that I have 1.5 lt of the shrimp broth and I need to make something with it because freezer start to be too full with many kind of stocks. Beef, chicken, shrimp and veggie stocks.

So finally today I made it, but completely forgot to get cilantro and basil. Auch!

So, this one is a twisted Tom Yum, but I LOVE it since I did something really different and this soup became sweet and sour and WITHOUT adding any sugar or sweetener!

Let’s start!

Ingredients:

  • 2 cm of ginger, crush it
  • 2 cm of galangal, crush it
  • 2 lemon grass, crush it
  • 3 green tomatoes, quarter it
  • 1 red tomato, cut to 8
  • Lime leaves
  • Big red chilies
  • Small red chilies
  • Small bird chili
  • Shallots (as much as 1 big yellow onion), slice it
  • 2 garlic cloves, crush it
  • 200 gr of shrimp/ prawn
  • 2 big squids, cut it to bite size. DO NOT throw away the squid ink. This is the “sugar replacement”
  • Salt
  • White pepper
  • Lime juice

Instructions:

  1. Prep up the shrimp and the squid. Pour in the lime juice, salt and white pepper.
  2. Heat up the pot in medium flame, add in oil, and once ready, add in the shallots and the garlic. As usual, the key to whole and deep and sweet flavor is to caramelize the shallots/ onion!
  3. Once almost caramelized, add in the lime leaves, ginger, galangal, and lemon grass, continue until you see your onion/ shallots is caramelized.
  4. Add in red tomatoes, mix it in for about 1 minute, followed by green tomatoes, and the chilies, and pour the shrimp broth. Wait until it starts bubbling. Then lower the flame and simmer for about 10 mins.
  5. Then, add in the shrimp and squid only until the shrimp goes red. (Around 4-5 mins)

That’s it.
Yes, it’s that easy. Spicy, sweet, sour, hot and fresh for the hot day!

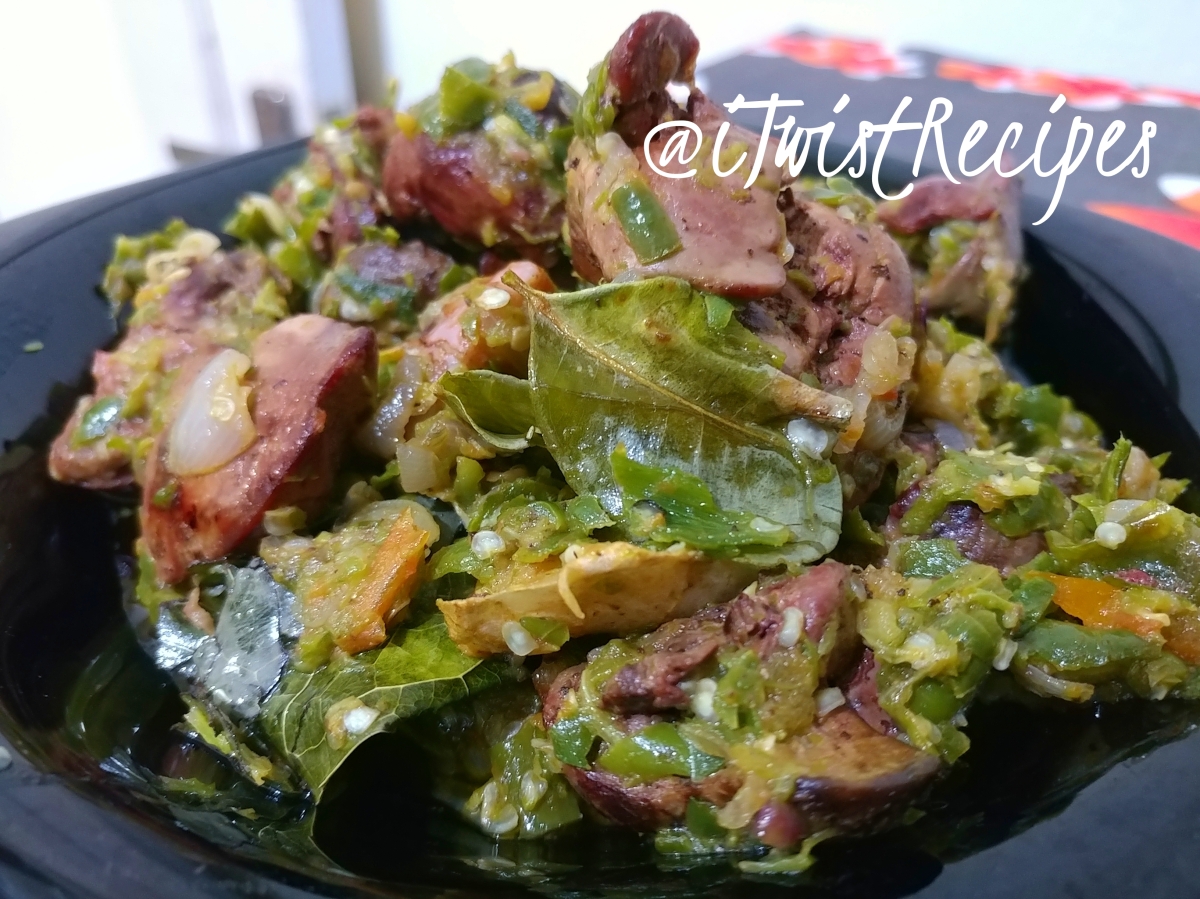
Spicy green chili chicken gizzard & liver

I had the inspiration to cook it from a shared post by a friend of mine in Facebook. The recipes were different one to another, but I got the idea.

Then, just based on my taste, I decided to go with my guts. Here it is!

Ingredients:
– 100 gr curly green chilies
– 100 gr large green chilies
– 100 gr bird’s eye chilies
– 10-15 medium shallots
– 5 garlic cloves
– Salt
– Lime leaves
– Bay leaf
– 2 cm ginger
– 2 cm galangal
– 5 pairs of liver & gizzards (around 500 gr)
– 3 small green tomatoes or 1 red tomatoes

Optional: curly lettuce (I’ll tell you why later! 😉)

Instructions:

  1. Simmer the liver & gizzards along with 2 cloves of garlic and salt until the gizzard is tender.
  2. Do not throw away the water after the gizzard is tender. Instead, put all kind of green chilies and the tomato and boil until they’re soft.
  3. Fry the liver and the gizzard (half fried) and then put them aside.
  4. While frying the liver and gizzard, slice the shallots and 3 cloves of garlic. Once done frying the liver and gizzard, then saute and caramelize the shallots, garlic, lime leaves, bay leaf, galangal, and ginger.
  5. Use the food processor, pulse the chilies and tomato only until they’re “shredded”. Or you can also use the mortar and pestle. I’m lazy. I chosed food processor. Not even a minute!
  6. Once the ingredients in your pan are caramelized well, mix in the shredded chili and tomato for about 2 minutes, then add in the liver and gizzard. Just mix them and that’s it. You’re done!

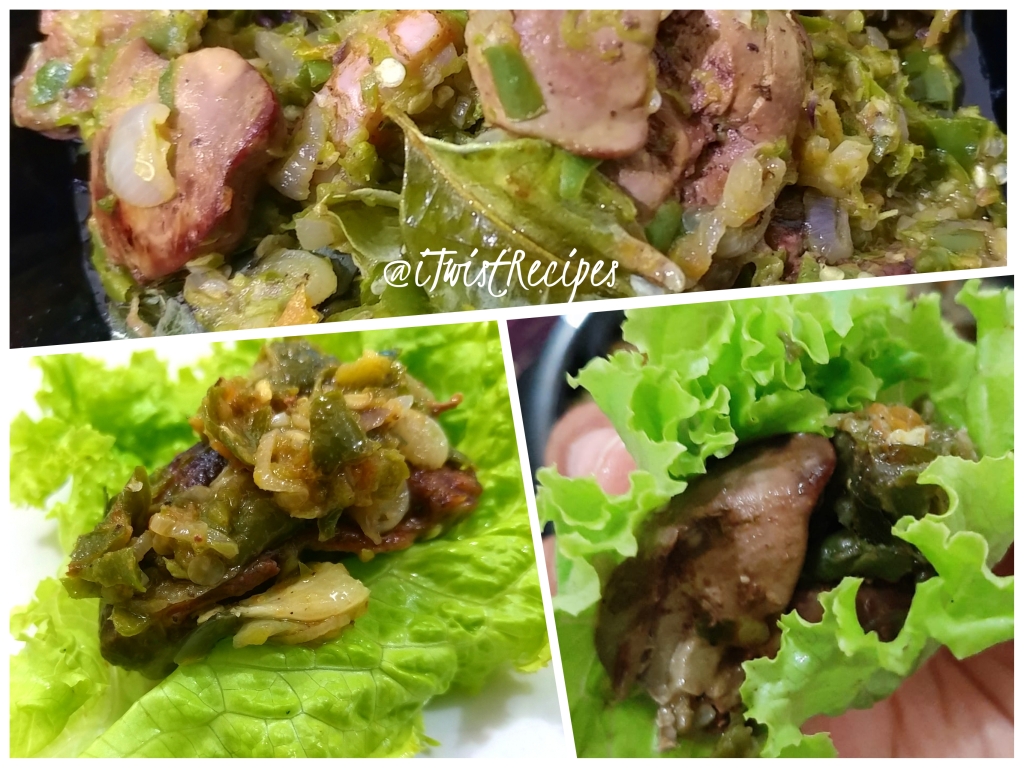
I had an ice cream sandwich earlier in the afternoon. So, to reduce my guilty feeling, I tried to be healthier on my dinner. I was inspired by the Bulgogi that I ate by wrapping it up with the lettuce, so I also wrap it up with the curly lettuce! And guess what? I LOVE IT!

Selat Solo (Javanese Beef Steak)

Ingredients:

– 1 kg tenderloin/ shank
– 20 shallots (more or less)/ 1 big green onion
– 3 garlic cloves
– 3cm ginger
– 2 ghost chillies
– salt
– pepper
– 5 tbsp tomato ketchup
– 2 big fresh tomatoes (dice it)
– 1 big fresh tomato (slice to 6)
– Sweet soy sauce (5 tbsp)
– lettuce
– 4 boiled eggs
– 4 tbsp sweet soy sauce
– a bit of freshly ground nutmeg
– 1 tbsp corn starch

Complements:
– fried potato wedges
– steam/ boiled green beans and carrots
– mayonnaise

Instructions:
1. Marinate the beef with salt and pepper for at least 3 hours
2. Blanche the potato wedges, carrots and green beans in salted water.
3. Put the beef and the veggies in the fridge
4. Grind/ blend shallots/ onion, garlic, ginger and chilies with a bit of coconut oil in the food processor
5. Dice the 2 tomatoes
6. Heat up the pressure cooker on the big flame, pour about 3 tbsp of coconut oil once you can see the smoke, brown the meat on all sides. About 1-2 minutes each side. Put them aside.
7. Start to sautee the shallots-garlic-ginger-chili mix. About 3-4 mins, on a medium flame. Then add in the diced tomatoes, until they go wilted and a bit caramelized.
8. Add salt, pepper, freshly ground nutmeg, sweet soy sauce, tomato ketchup. Stir it up, add the browned meat and boiled eggs.
9. Pour boiled water around 1-1.5 ltrs, crank up the heat and cover the pressure cooker with the lid. Turn the stove off 20 minutes after sizzling.
10. Move the meat and the egg to a big wok, and strain the broth.
11. Simmer it to the consistency that you want (I love the broth so I always leave more than enough broth, and anyway…you need the broth to be the gravy)
12. When it seems enough gravy you have in the wok, then, add the mix of 1 tbsp corn starch with a bit of cold water. This will make the broth turns to gravy consistency.
13. The rest? Just fry the potato wedges, steam/ boil the carrots and green bean. Don’t take too long for boiling them, since crunchy veggie is the key.
14. To serve it, just arrange the egg, lettuce, sliced tomatoes, fried potato wedges, the veggies on the plate and put the meat in the middle. Pour the gravy all over and put 1 tbsp mayo to complete it.

It’s easy. Just too much to do 😁

Yellow Spiced Fried Chicken

My favorite recipe. I can cook this and keep it in the fridge and only fry it when I need!

As promised in the previous post, here is the recipe for the yellow spiced fried chicken. As far as I know, my grandma cooked this before I was born. I didn’t get the recipe from her because she never really told me how until the day she passed away. So I will decide that it is a Javanese meal, the island with the most population in Indonesia.

Some of the ingredients probably is not easy to be found. However, I will try my best to give you the alternative.

One of the sexy ingredient is Turmeric. This is the hero of this dish because this one makes the chicken yellow.turmeric

What I love about cooking this, I can just keep it in the fridge and only fry it when I want to eat. Pretty practical for modern life without having to freeze it, thaw it, etc etc…

Okay let’s start.


Ingredients:

  • 1 Kg of chicken (you can also add liver, gizzard whatever, as long as the total weight is 1 Kg)
  • 2 bay leaves
  • Enough water to cover the whole chicken

Crushed Seasonings:

  • Salt
  • White ground pepper
  • 6 pcs candle nuts
  • 1 clove of garlic
  • 1 tsp coriander seeds (optional, but it’ll taste better. You can replace it with ground coriander)
  • 2 cm turmeric (or maybe…1 tbsp ground turmeric. Add bit by bit from 1/2 tbsp)

Instructions:

  1. After you’re done crushing the seasonings, heat up the pan, put enough frying oil, and saute the crushed seasonings and bay-leaf until you smell the aroma.
  2. Then, add in the chicken, and pour the water until covering the chicken. Then, shimmer it with the small flame until the water’s gone and what’s left is just the goodness. The chicken, and the chicken fat. Until here. you’re basically done. You can leave it until it’s cooling down and store it in fridge, or just fry it.

Yeap it’s easy. That’s why it’s always been my favorite. I got 2 products. The chicken, and the spiced chicken fat (this one can be used for fried rice, veggy stir-fry etc!

Have fun!

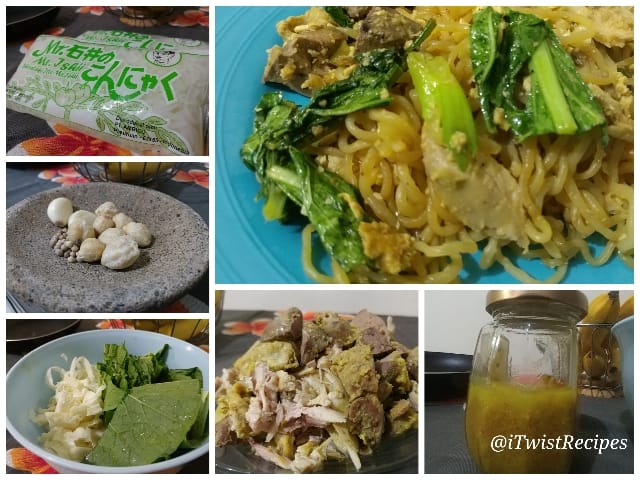
Fried Shirataki Noodle with chicken and liver

When you try to avoid feeling guilty of the carbs, replace it with Shirataki noodle

DISCLAIMER:

I use Shirataki noodle because I tried to avoid carbs. But since I am a dirty Ketorian, I still use the normal sweet soy sauce and oyster sauce, even though I shouldn’t. My bad.

I didn’t even know what is the effect of candle nuts. I have no idea on how to calculate the nutrition. So… this Shirataki noodle is just to reduce my guilty feeling. But don’t take this recipe as a keto recipe.

You can also replace the yellow spiced chicken and liver with the raw one. But remember to fry them until it’s cooked before mixing it up with your noodle.

Portion: 5-6 plates

Ingredients:
– Shirataki noodle 2 packs
– Mustard greens
– Cabbage
– Spring Onion
– Shredded yellow spiced chicken and liver (okay…I will post another recipe on this)
– Chicken fat
– 3 eggs
– Sweet soy sauce
– Oyster Sauce

Crushed seasonings:
– Salt
– White pepper corn
– 8 candle nuts
– 2 cloves of garlic
– 6 cloves of shallots (you can replace it with 1 caramelized yellow onion)

Instructions:

  1. Saute crushed seasonings until you can smell the aroma, then put it aside
  2. Scramble the eggs
  3. Add in the crushed seasonings, shredded yellow spiced chicken and liver, mustard greens, cabbage and spring onion.
  4. Mix it up until the mustard greens are half cooked, then add in shirataki noodle. Add sweet soy sauce and and oyster sauce and mix it up again until the color is evenly brown from the sweet soy sauce.
  5. You’re done!

Sour Fish Soup

an easy and healthy dish to make! And no…it’s not fishy. It’s fish soup. But not fishy.

Quick meal. Healthy and tasty!

Ingredients:
500 gr any fish. Tuna, carp, gold fish, catfish any kind.
3 tbsp fried oil
1 tsp salt
5 chilies, slice thin
6 shallots, slice thin
500 ml water (if you have fish/shrimp broth, that would be great!)
3 cm fresh ginger (grind it)
1 tsp white pepper ground
2 pcs spring onion, slice thin
basil leaves (a cup)
2 lime leaves
crushed lemon grass
turmeric leaves (just enough)
½ lime, or 1 lemon
1 ½ tbsp salt

Cooking instruction:

  1. Clean up the fish, and rub the salt and lemon/ lime on it. Leave it for 15 mins.
  2. Heat up the fried oil, and saute the shallots, lime leaves, turmeric leaves until you can smell the nice aroma.
  3. Add water/ broth, add in spring onion, pepper, salt and leave it until it’s bubbling. (on a medium flame)
  4. Add in the fish and the lime/ lemon juice and chillies, leave it for 5 mins, then add in the basil leaves. Don’t leave it on the flame too long, just about 1 min, and then whalla! It’s done!

Easy Recipe: Vegan Black Pepper Tempe & Tofu

Hello! This recipe is not twisted from any recipes. It is based on my original Black Pepper Beef recipe (yes yes…next time, meat eaters!), but I twisted it for my BF that decided to join the plant-based lifestyle. So instead of using beef, I use Tempe and tofu (a rich source of protein from soy). I also took out the oyster sauce but use everything else.

MAYBE, not a real vegan dish too (I’m being undecided) since I was using 8gr of brown sugar. But…some vegans still consider the brown sugar vegan. So…forgive me. I’m not an expert at this.

So yeah! I made it for my BF, and he called it “the last supper”. Why? I got a new job! Whoohoo!! But, my office will be about 20Km from home and in Jakarta, it is a pain in the arse to commute that far on weekdays. So I decided to rent a room nearby the office. But he said for the last supper he wants this menu as if I work in another country. Hahahaha… silly him.

Alright! Now let’s go to the recipe.

INGREDIENTS:

  • 250 gr tempe
  • 250 gr firm tofu
  • Coconut oil to fry
  • 1/2 big red bell pepper
  • 1/2 big green bell pepper
  • 1 medium onion
  • 1 garlic clove
  • A dash of Sea salt
  • 1 cup of water

    Marinating Sauce:

  • 3 tbsp black sweet soy sauce
  • 3 tbsp tomato ketchup
  • 8 gr (1 stick) brown sugar
  • 1 tbsp soy sauce
  • 1 tsp sesame oil
  • 1 tbsp Shaoxing wine/ Rice wine (substitute: Pale Dry Sherry)
  • 3 tsp crushed black pepper

INSTRUCTIONS:

  1. Fry the tempe and tofu half done. As long as you can already see the outer part is firmed, considered it’s done.
  2. While you’re frying the tempe and tofu, mix all of your marinating sauce ingredients in a big bowl
  3. Ground onion and garlic with a little bit of coconut oil using a food processor or mini chopper until it forms like paste.
  4. Prepare the bell pepper as you like.
  5. Transfer the fried tempe and tofu to the marinating sauce.
  6. In the pan, saute the ground onion and garlic until you can smell a piece of heaven in your kitchen, then put the marinated tempe and tofu along with the sauce and mixed them all. Stir it until you can see some of the sauce is caramelized, then pour the water.
  7. The sauce is easily thickened by the ground onion and garlic so you don’t need to add flour/ corn starch to thicken it.
  8. Then simmer the sauce to your preference, then 5 minutes before you’re done, add the bell peppers, mixed it, and cover with a lid and let them simmer further for 5 minutes.

THAT’S IT. It won’t take you more than 30 minutes to prepare this dish (including washing your dishes!).

He LOVED this dish, and even more today. Go on and try, then tell me how it goes!

Easy Snack Recipe: Tofu Burger in A Blanket

It is one of the hundreds (if not thousands) Indonesian favorite snack. Yes, we snack every time, everywhere. With over 250 tribes from Sabang to Merauke, through more than 17,000 islands, everywhere you go, you’ll find traditional snacks and you’ll see that all of us love to nibble. During a meet up with friends, during working, on the bus, on the bus stop, on the train, on the train station, at home, EVERYWHERE!

Now, I’ll share this recipe for one specific reason. My Canadian bf LOVES this tofu burger in a blanket very much! Today is pretty much one of his last days eating meat since he’s going plant-based. So he wants meat galore! From the snacks to the main course! HA HA!

One thing about this recipe, if you prepared everything in advance, it won’t take you a long time to just fry it. But if you do all at once, it will easily take around 1,5 hours (including washing the dishes). So I will break it down to the way I usually do it.

TOFU – 8 pieces

  1. Make sure you’re using the hard tofu. The size is usually 5x5x1.5 cm. In here I can find the 1 package with 4 tofu in it.
  2. Then, cut diagonally, and create pocket using the knife. Don’t throw out the cut. Crumble it to be mixed with the fillings later.
  3. Put all pocketed tofu in the pot and pour water just so all are submerged, add a dash of sea salt and then put on medium flame until it’s boiling. Once boiling, wait for 5 minutes before turning the stove off.
  4. Put the tofu on the rack and let it cool down.


BEEF – 300 gr

  • Don’t use minced beef. Most tender beef cuts, such as sirloin, tri-tip, ribeye, top loin (strip), tenderloin, shoulder center (Ranch Steak), shoulder top blade (Flat Iron) and shoulder petite tender, can be cut into strips for use in stirfry recipes.
  • Then slice the beef into small sizes.


VEGETABLES

INGREDIENTS:

  • 3 medium carrots
  • Half of the medium-sized cabbage
  • 150 gr bean sprouts

INSTRUCTIONS:

  1. Wash the cabbage, and slice it thin (like if you want to make coleslaw).
  2. Wash the bean sprouts
  3. Peel the carrot and shred it.


GROUND SPICES

INGREDIENTS:

  • 1 large yellow onion
  • 6 medium shallots
  • 1 garlic clove
  • 2 tsp coriander seeds (ground it using pestle and mortar – look at the image above)
  • 5 candlenuts
  • 2 tsp ground white pepper
  • salt
  • 5 tbsp coconut oil

INSTRUCTION:

Put everything in the mini chopper or blender, and ground them.


THE FILLING

INSTRUCTIONS:

  1. Heat the big pan on medium flame, and then add the ground spices. Stir-fry until you can smell the good fragrant spices.
  2. Then add the meat and make sure the spices mixed well with the meat, and keep stir-fry it until the meat are all browned.
  3. Once the meat browned, add the veggies and the crumbled tofu.
  4. Mix everything well and cover it for 5 minutes over medium flame.
  5. Open the cover, stir-fry it for another 5 minutes, and then transfer it to a big bowl and let it cool down.


PREPARE THE TOFU AND THE FILLING

  1. Arrange the tofu, the filling and prepare one empty plate.
  2. Fill up the tofu pocket with the filling.


THE BLANKET

INGREDIENTS:

  • 1.5 cup of all-purpose flour
  • 2 tbsp of rice flour
  • Salt
  • White pepper
  • 2 tsp ground coriander seeds
  • 2 spring onions, slice it small.
  • 1.25 cup of ice water.

INSTRUCTIONS:

  1. Add all ingredients without the ice water. Stir it a bit so it mixed-up well.
  2. Slowly pour the ice water up to the consistency that you want. Some people like the thick blanket, if so, reduce the ice water. But if you like it light and crunchy like I do, use 1.25 cup of ice water. The blanket would be a bit runny but not so much.
  3. Then just put your blanket dough and the ready to be fried tofu with the filling near the stove.
  4. Heat up your pan and fill up with coconut oil (take a wild guess that it will submerge the tofu) over medium flame. It should be hot enough so your tofu burger is not greasy. The way I test it is by using the wooden ladle. If you see bubbles like you see in the picture, then it is hot enough.

    20180303_140109_HDR_20180303173441937 (1)

  5. Simply cover the tofu with the filling with the blanket dough, and carefully put them in the pan. Fry 5 minutes each side.

Usually, if I make this, I will still have some leftover filling. You can just eat it as it is, or what my bf did is, treating it as veggie stir-fry and he’ll eat it with rice. It’s also good that way! So here it is, our snack and lunch!

20180303_145426_HDR (1)

The Best and Easiest Chicken Gravy Recipe

So, today I’m feeling a bit like an adventurer. I wanna make chicken gravy from the scratch based on ingredients I love and think are the best pair for chicken. So I decided NOT to take a look at any recipes and just go with my guts. It turned out AMAZING!

No. I’m not the only person who said it, by the way. Both my bf and his best buddy said it too. Then I decided to write down the recipe now before my limited memory decided to archive it to the place I would never be able to retrieve. (yeah, I’m THAT bad. hihihi)

This gravy is best made using homemade chicken stock (I promise I will give you the recipe as soon as I make it this week), and chicken fat that was dripped of your roasted chicken. But of course, you can just replace every cup of chicken stock with 1 chicken bullion cube and 250 ml (1 cup) of water, then double the butter to replace the chicken fat. (BUT, I really recommend the chicken fat drips!).

Here are the INGREDIENTS:

  • 1 tbsp butter (you can use salted or unsalted butter. Just remember to adjust the salt)
  • 1 yellow onion
  • 1 garlic clove
  • 2 tsp dried thyme
  • 1 tbsp cumin (a lot? yes, that’s because I love it. But you can adjust it to your taste. Start with 2 tsp at least)
  • 2 tbsp all-purpose flour
  • 2 tbsp chicken fat drips (or replace it with butter)
  • 2 cups of chicken stock (or 2 chicken bouillon cube + 500 ml water)
  • Black pepper
  • Salt

INSTRUCTIONS:

  1. Start with 1 tbsp butter in a pan using just medium flame, and add the thinly sliced yellow onion right after the butter is melted.
  2. Once the onion starts to look transparent, add in the thinly sliced garlic. Keep turning them until caramelized.
  3. Once it’s beginning to be caramelized, add dried thyme and cumin and keep turning them around 2 minutes.
  4. Add in all-purpose flour and mix it with the onion and the garlic and after they’re mixed, pour the chicken fat (or extra butter) in and turn it for 1 minute, then pour in the chicken stock (or water with the chicken bouillon cube).
  5. Shimmer it on small flame to thicken to about 1 cup (Since you need to strain it later, take a wild guess that after it’s strained, it’ll be 1 cup)
  6. Season it with salt and pepper, taste it, and after you’re happy with it, leave it there for 2 extra minutes before straining it.
  7. Now all you need to do is just straining the gravy and prepare to receive praises with grace!

What can you do with the gravy? Well, pour it on a chicken sandwich for breakfast, or on your mashed potato at lunch and on your roasted chicken for dinner! You can even pour it on your pasta! Use your wild imagination! Be crazy about it JUST BECAUSE YOU CAN! Make more of it because this recipe is only made for 1 cup of gravy!

Lemme know how it goes! If you twist this, let me know how you twist it and I promise I will give it a try!

An Easy Meat Soup Recipe!

I think I’ve told you already about my “Lazy Keto” eating style? Yeah. I happen to LOVE every fatty things this world offers. I don’t like sweet food and not really enjoy carb. In Indonesia, we normally eat white rice. But I don’t like it. I LOVE egg noodle tho. So the only challenge for me in getting into Keto style is to say goodbye to egg noodle. Pfftt…

Well anyway, my love to fat makes me cherish this soup very much. Not only it’s easy and practical, but also it’s so yummy! This time, I’m not twisting anybody’s recipe (Boooooo….!!!!!). I just love every ingredients in this recipe and I just decided to add them all. How about that? hihi…

You need pressure cooker if you want it to be fast. But if you don’t have it around, well, just add everything in the pot and shimmer it over small flame for 2 – 3 hours (until the meat is tender).

These are the only ingredients you need:


Exactly that!

INGREDIENTS:

  • 1 tbsp of coconut oil/ unsalted butter
  • 1 big yellow onion
  • 1 red tomato
  • 4 – 5 garlic cloves
  • 2 stalks of celery
  • sea salt (I use 1 Tbsp)
  • white pepper
  • 500 gr of beef brisket (I choose the most fatty ones!)
  • Boiled water (double the water over the mix of veggies and brisket. If you see in your pressure cooker the height of the mix is 5 cm, then make sure the water goes to 10 cm. Take a wild guess!)

INSTRUCTIONS:

  1. Heat up the coconut oil in the pressure cooker pot over medium flame
  2. Add in Onion, then garlic, then tomato and then celery stalks. Fry it until you can smell a piece of heaven in your kitchen (I like to get a little char on the veggies. Somehow it creates better taste). While you’re waiting for the veggies ready, you can boil the water.
     

  3. Then throw in the brisket, and sear it. Then, add the boiled water, and put on the pressure cooker lid, and crank up the high flame.
  4. It’ll be done 25 minutes after the first sizzle.
  5. (This one is optional) Take out all of the veggies and leave only the tender brisket and move it to a medium pot. Taste and adjust the sea salt and white pepper to your liking. Then it’s done!

This recipe makes 3 meal portions for me.

You can add in carrots, cabbage, or potatoes after this step. But I like it this way. Even tho my bf doesn’t like fatty food, he always devours the broth and happily drink it. He will take around half the broth and then add in potato, carrot, barley, glass noodle or whatever he likes. You can do that too!